Basket Preview
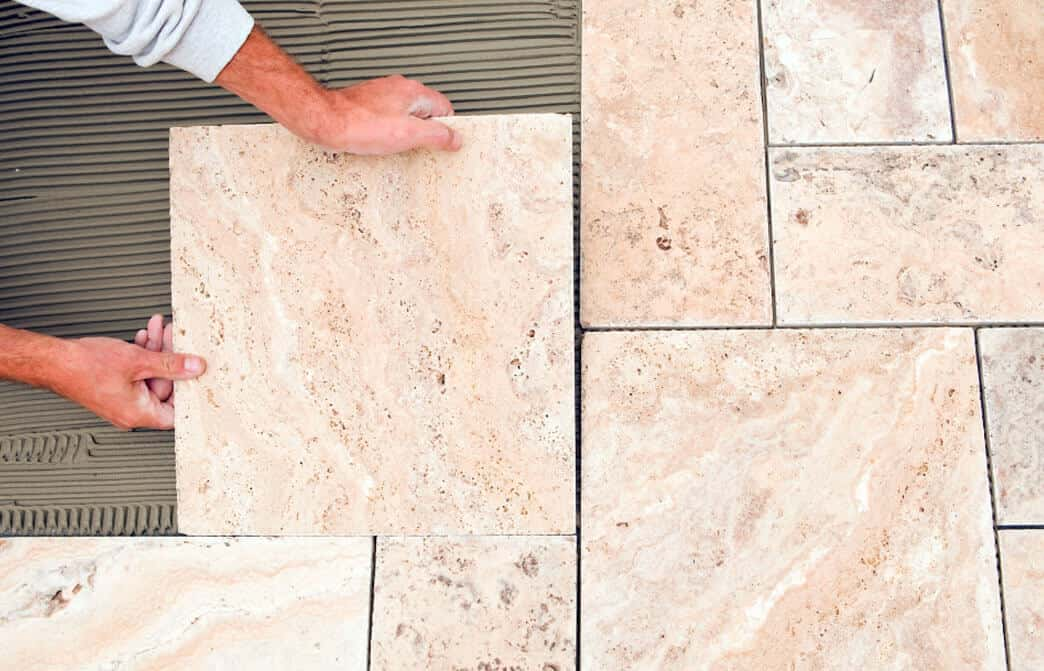
Natural stone Tiles and Mosaics
Below we have provided some general guidance to help when installing natural stone tiles. It is by no means a definitive guide and we can only advise on use of products supplied by Natural Stone and timber Ltd. We would always recommend using the services of a professional tiling contractor when undertaking any natural stone tiles installation, as mistake can be very difficult and costly to rectify.
When using natural stone for any application it is always advisable to follow manufacturer's instructions on adhesives, sealants and cleaners, and always to use appropriate safety equipment.
Always measure your area at least twice and please try to get a second opinion from a professional. Always order at least 10% over your measured area to allow for cuts, wastage and tile selection. If you are running low on tiles and it looks like you will be short, please contact your branch to place an order as soon as possible, you may need to take a waste piece of the installed tiles down so a suitable colour match can be provided.
When cleaning all types natural stone tiles such as Marble, Travertine, Limestone, and Granite it is important to use the right type of cleaner. Any cleaner you use must be PH neutral and suitable for natural stone products. These cleaners are often available as concentrated solutions that are diluted with warm water, not unlike typical floor cleaners, widely available through any natural stone distributor and most good builders' merchants.
Most substrates can be tiled, but we would always recommend that you talk to a tiling contractor prior to installation to assess the suitability of your substrate. Below is some general guidance on different substrate properties and their suitability for natural stone tile installation.
Gypsum Skimmed Plaster board or wall - It is not recommend installing Natural stone tiles on either of these substrates as they do not have the load bearing capacity required for any natural stone materials. Any gypsum plaster should be removed before installation.
Bare Plasterboard - This substrate is suitable for Natural stone tiles installation, but you will be limited to a maximum weight loading weight 32KG per sqm. Plasterboard must be installed to manufacturers guidelines for natural stone installations
Existing tiles - It is not recommended to tile onto existing tiles as the installation will be reliant on the soundness of the original installation, which cannot be guaranteed. We would always recommend removal all existing tiles before installation and checking the suitability of the substrate before installing your new tiles.
Brick and Block walls - This substrate is perfectly suited to the installation of natural stone tiles if the surface is sufficiently flat to receive the tiles. We would recommend that a maximum loading bearing capacity of 40KG per sqm, for this substrate but depending on the integrity of the surface more is quite possible
Sand and cement render - Natural stone tiles can be fixed directly onto sand and cement renders, they make an ideal surface for a successful installation. Sound render has a maximum loading bearing capacity of 40KG per sqm. All render must be fully dry before commencing installation, you must allow at least two weeks for internal applications and three weeks for external. The moisture level must be checked before commencing work as climatic conditions can vary drying times.
Painted or Papered walls - These surfaces are not suitable for tiling and all paint and paper must be removed before any installation. After removal, an acrylic primer should be used before the commencement of tiling.
Tile Baker Boards - Tile backer boards are ideal for natural stone installation and in some case can take as much as 200kg per sqm if the manufacturer installation instructions are followed correctly.
Sand & Cement Screed - This is an ideal fixing substrate, but new screeds will need to cure or dry out at a minimum of 1 week for every 20-30mm of screed depth but depending on weather conditions it can take as long as 1mm per day to dry correctly. It is especially important that this guidance is followed, and the moisture level is checked before tile installation. Fresh screed can shrink during drying which can create cracks which in turn will transfer into the tiled surface unless enough drying time is given prior to stone installation.
Anhydrite screed - This substrate is ideal for natural stone tile installation but a particular problem with anhydrite screeds is a layer of Laitance, which is a weak layer of fine particles deposited on the surface of the screed, generated by water migrating through to the screed surface as drying occurs. Before laying tiles, you must ensure that all laitance and any other loose surface material that might inhibit the adhesion of the tile adhesive is completely removed. This can be achieved using 60 grit sandpaper and a suitable sanding machine.
IT IS RECOMMENDED THAT A DE-COUPLING MATTING IS INSTALLED ON ALL NEWLY SCREEDED SUBSTRATES.
Timber Floors - Wood or plywood floors will be subject to movement and this movement will transfer through to the tiles if installed directly onto this substrate. The surface should be securely fixed down to prevent any movement and then a de-coupling matting should be installed to prevent the transfer of movement to the tiled surface. Please refer to the de-coupling matting section
All surfaces should be structurally sound, clean, dry, grease and dust free and suitably level. All surfaces must be fully secured without any movement and suitable to carry the load of the chosen tiles. When this has been established you will need to prime the substrate before installation of your tiles with a suitable acrylic based primer, this helps adhesion of the tiles to your substrate. This is especially important on newly screeded floors as the surface is particularly dusty.
It is worth considering isolation or 'decoupling' matting when laying natural stone tiles, particularly in areas with underfloor heating, on newly screeded floors, where movement is likely to occur, on wooden substrates or where your floors have more than one type of substrate. This will create a barrier between the floor and the tiles, which will soak up any movement and protect the tiles from cracking, one of the most common causes of problems in travertine, limestone, marble and slate tile installations.
PLEASE FOLLOW CLOSELY THE MANUFACTURERS INSTALLATION GUIDELINES BEFORE AND DURING INSTALLATION.
All natural stone tiles are suitable for underfloor heating and will help retain heat during use, helping reduce your energy usage. Where underfloor heating is to be installed, always follow the manufacturers guidelines using the correct and suitable adhesives and fixing materials and allow time to dry where necessary.
On most internal tiling applications, a joint spacing of either 3mm or 4mm is standard, but due to the tolerances with natural stone you can expect + or – 2mm tolerance on these widths, this might mean adjusting your grout width slightly to accommodate these tolerances. We do not recommend butt jointing any of our natural stone apart from products such as Opus pattern travertine tiles which have been designed to be laid this way
If you have particularly uneven surfaces, we recommend that you go for at least 4mm joint spacing or even bigger if the tiles allow. This will help on installation, allowing for additional adjustment that might be needed.
On tiles over 400mm in length we would recommend a staggered joint of no greater than one third of the length of the tiles as a suitable staggered tile distance. It is not recommended that they are brick bonded with a staggered joint at 50% of the tile's length.
Movement joints in walls and floors should be placed at all plane changes such as ceiling and floor positions and vertically at the end or start of each wall, or where the flooring hits a restraining surface, such as perimeter walls, thresholds etc
On larger floor installation it is recommend that areas that are less than 10 meters in length, no intermediate movement joints are necessary except at the perimeter walls, but if the floor exceed this length a movement joint will be required and would normally be spaced equally along the length of the installation. In installation where the floor area exceeds 40sqm it is recommended to install additional movement joints, especially when under floor heating is to be used.
If the tiled surface is to continue into different rooms without using a threshold to divide these areas, it is recommend substituting the threshold with a movement joint.
Any existing movement joint contained within the existing wall or floor substrate should be continued to the finished surface of the installation
It is very important that natural stone tiles are laid out to dry before fixing so that you can ensure that they are spaced correctly and that you have mixed all the colour shades within your batch of tiles prior to fixing. Every batch of natural stone will be different and there will always be colour variation within each of these batches, ensure that your contractor opens all the crates or boxes of natural stone and select from each one as he lays.
When using un-calibrated natural stone such as slate tiles you should also think about grading each of the tiles for thickness at this stage. Always select the thickest tile to fix first and then the adhesive can be used to bed up the thinner tiles, this will help create a flat finish without any raised edges on the tiles.
PLEASE NOTE: AT THE POINT OF INSTALLATION NO COMPLAINTS REGARDING THE APPEARANCE OR SUITABILITY OF THE PRODUCT WILL BE ACCEPTED BY NATURAL STONE AND TIMBER LTD.
Always use a cement-based tile adhesive when installing natural stone tiles, all tiles must be solidly bedded using a notched trowel. We would also recommend back buttering each tile with the tile adhesive, checking for any pits or holes and fill these with adhesive at the same time. With low porosity natural stone such as marble, you must always use rapid adhesive and limit the height of installation in one day, allow to fully dry before continuing. Rapid adhesive should also be used on all wall applications to stop any movement of the tiles during curing.
For tiles that have more tolerance in the calibration process (more variation in thickness) we would always recommend using a slightly thicker bed of adhesive, between 10-12mm. This is to allow for the additional bedding of the tiles.
Once a point has been reached where cutting is required it is a good idea to clean any excess adhesive away from untiled areas and from the surface of any installed tiles
PLEASE NOTE: AT THE POINT OF INSTALLATION NO COMPLAINTS REGARDING THE APPEARANCE OR SUITABILITY OF THE PRODUCT WILL BE ACCEPTED BY NATURAL STONE AND TIMBER LTD.
We recommend that you prepare all your cuts after dry laying and prior to fixing. When cutting natural stone tiles, it is best to use a diamond blade, and preferably a good quality wet cut tile bench, to reduce the amount of dust produced and to provide a successful cut through the tiles
All natural stone tiles have different characteristics when cutting with more dense products such as Marble and some Limestone tiles, more care will need to be taken when cutting to reduce breakages, it is a good idea to select the tile with least veining for more complicated cuts
Always follow specific guidelines on cutting tools and use the correct safety glasses and a dust mask, and where applicable, use ear defenders. Once the cuts have been made, clean the pieces to remove any dust or debris and where applicable allow them to dry before fixing.
Once all tiles are laid, remove any excess adhesive, and thoroughly clean the tiles (it is recommended that a natural stone cleaner is used for this).
We always recommend using a high-quality impregnating sealer on all natural stone tiles. All surface finishes on natural stone tiles are porous therefore require sealing before and after grouting. This process is essential to help fill these pores present within the tiles, with the protective polymer contained within the sealant. It is very import that the first sealant application is done before grouting, if this is not done, minute particles of grout will sit in the pores and can result in a hazy surface appearance.
Sealing will hugely improve the lifespan of the surface finish of any natural stone giving it long lasting protection against oil and waterbased stains. Depending on the type of sealant used it can offer protection for up to 10 years. Assuming it is correctly maintained and cleaned with suitable natural stone cleaners you will have a beautiful and low maintenance tiled area for years to come.
Before sealing, we recommend that the stone is cleaned thoroughly with warm water and a PH neutral natural stone clearer. This will remove general dirt and dust from the surface and pores within the stone.
IT IS VERY IMPORTANT TO ENSURE THAT ALL AREAS ARE CLEAN AND DRY OTHERWISE DIRT AND DAMP WILL BE SEALED INTO THE SURFACE OF THE STONE.
Once the first coat of sealant has been applied and completely dried, you can begin grouting. Always follow each manufacturer’s instructions on mixing grouts to achieve the correct consistency and quality.
We recommend using a flexible grout such as Ultra Tile FLEX JOINT grout this product is suitable for all areas of the home and will provide a limited degree of flexibility in areas where some movement might be possible.
This grout is also suitable for slurry grouting which is a method that will be required on some natural stone tiles such as unfilled travertine or some limestone products. This technique will fill all of the naturally occurring pits within the surface of the stone. This method should not be used on Polished, honed of riven surfaced materials as grout residue can be left behind.
Always follow the manufacturers guidance on mixing and application of their specific grouting products but please ensure that particular care is taken to clean and wipe away grout until the surface is completely clean and the sponge you are using runs clean. Finally going over with a clean dry cloth to ensure the surface is completely clean prior to sealing again.
IF YOU NEED ANY ADVICE PLEASE CONTACT A MEMBER OF STAFF AT YOUR LOCAL DEPOT, ON ONE OF THE NUMBERS BELOW, WHO WILL BE HAPPY TO ADVISE YOU ON ANY OF OUR PRODUCTS.
See our locations