Basket Preview
Authentic Lawns Artificial Grass
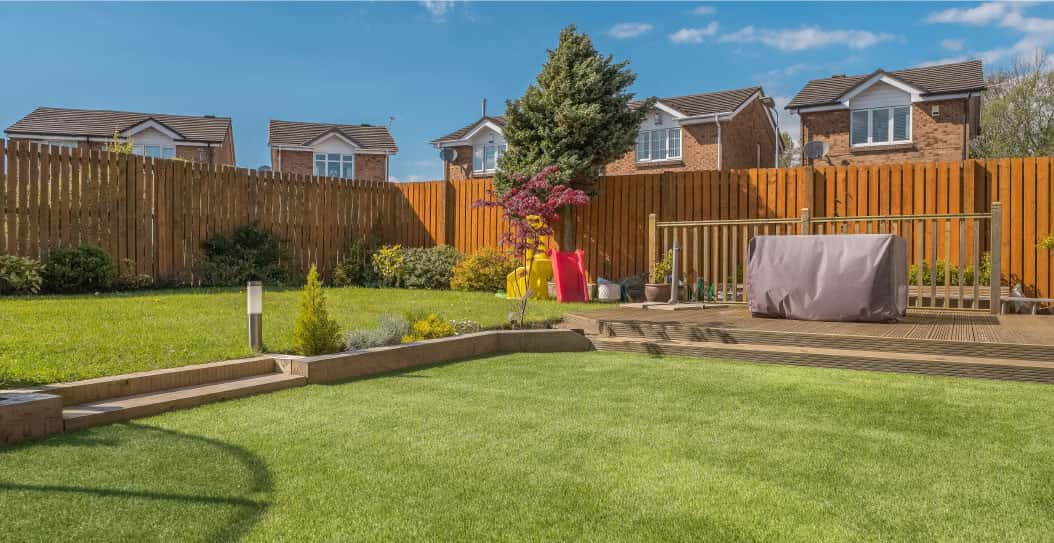
Whether your look to undertake this project yourself or get in a landscape contractor to undertake the work, the guidance below will give you some helpful pointers to ensure you get a great finish to your new Authentic Lawn. With all projects of this type prior preparation is the key to success, so always carefully select the correct grass range to meet your requirements and always be careful not to cut any corners on installation as this will ensure the long term success of your project.
All our artificial grasss comes in 4m width and is on rolls up to 25 metres in length. Planning your garden onto grid or graph paper will help in both working out how much grass to purchase, as well as the best way to position the grass to minimise joints. Always allow some additional length over all edges for getting your cuts perfect. You are looking to keep the amount of joints to a minimum as this will make the job easier and improve the finished look.
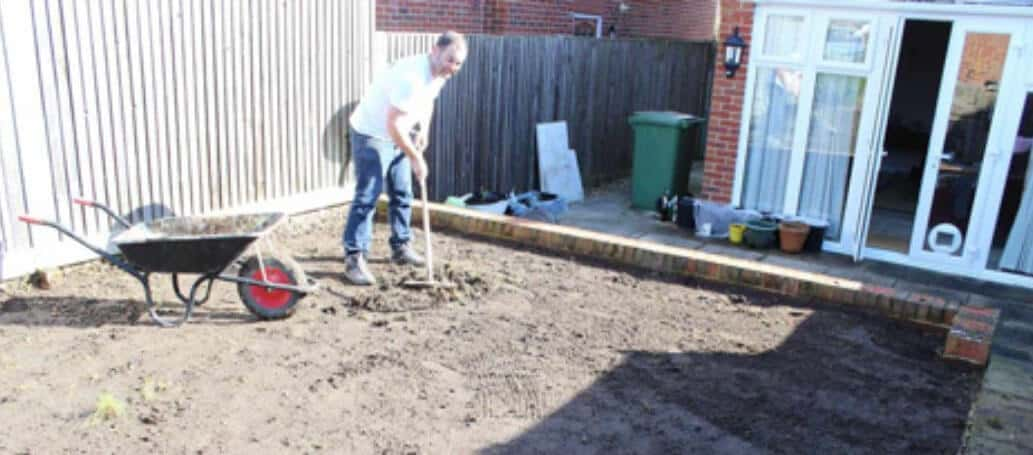
Ground Preparation The first job is to remove the existing turf. The best way to do this is with a turf cutting machine, which you can usually find at your local hire shop. If it’s just a small area you can do this with a shovel, but it can be hard work and is sometimes not so good for your shoulders. The turf cutter will usually have an adjustable depth setting, this can be set to remove enough material for your 50mm base in one pass of the machine. If not, a second pass can be made after the turf has been rolled up and removed to reduce the depth further.

Once you’ve spread the base material over the whole of lawn area, you will need to level this material with a Landscape rake so that you create a nice even flat surface, it’s very important to get this part correct as it will determine the final finish of your new lawn.
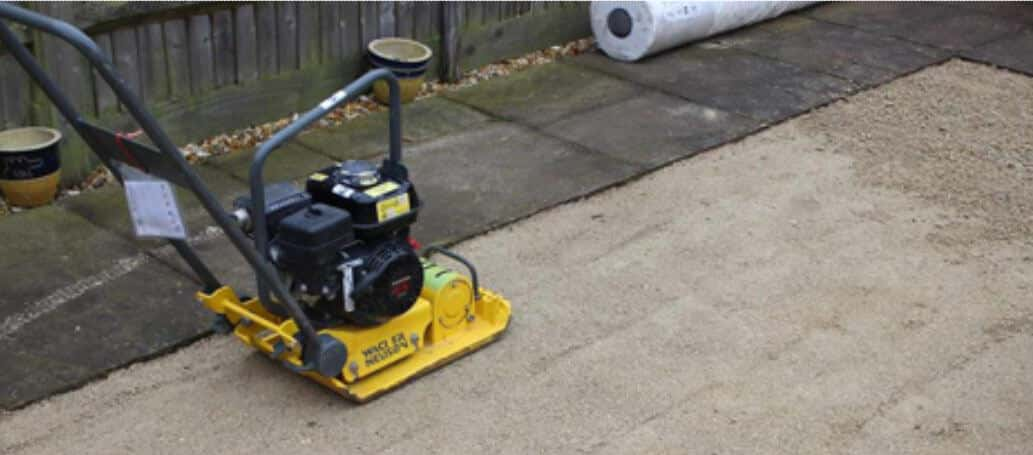
Once this has been completed its time to compact the base material, the best option is to hire a plate compactor as shown below. Compact the whole area a number of times, with each time you might need to do a little more levelling as the base material will not always compact evenly. Don’t forget that the level of your base should be around 10-20mm below your lawn edgings to allow for your chosen Authentic Lawns product to finish at the right height.
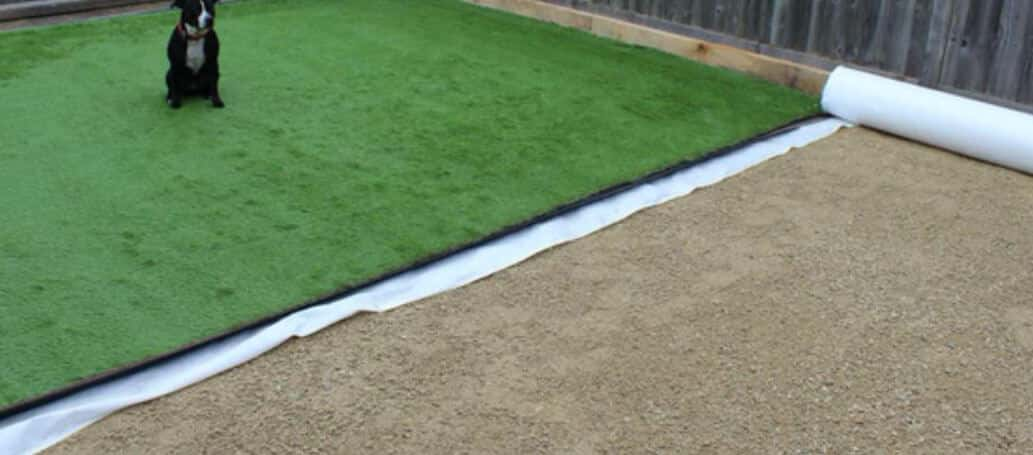
Once the whole area is covered with weed suppressant membrane you are ready to roll out your artificial grass. Always leave an overlap around all edges so you have some material past the cut line to trim off. Once it’s all rolled out leave the grass to settle for a couple of hours, ideally overnight.
Now carefully cut the overlapping edges with a very sharp knife, change the blade regularly to insure a neat cut. Take your time with this job as these finishing touches will make a real difference to the finished lawn, so it’s worth taking time to get it just right.
Sometimes on larger projects you will need to join two pieces of artificial grass together. To do this, firstly line up the two sections so the pile is in the same direction, ideally the pile would face towards the house. Then cut a straight line along the edge between the stitch lines two or three rows back from the edge of the roll, do this along the whole length of the join and on both section of grass. This will create a nice, neat, straight edge on both sides of your joint ready to glue. It’s a good idea now to make sure everything is perfectly clean as any grass strands can get in the way of the gluing process. Push the two edges together making sure you are happy that they meet perfectly.
Spade Rake
Hammer
Chisel (Optional)
Turf Cutter (Optional)
Plate compactor
Sharp Knife
Glue Spreader
Stiff brush Suitable PPE
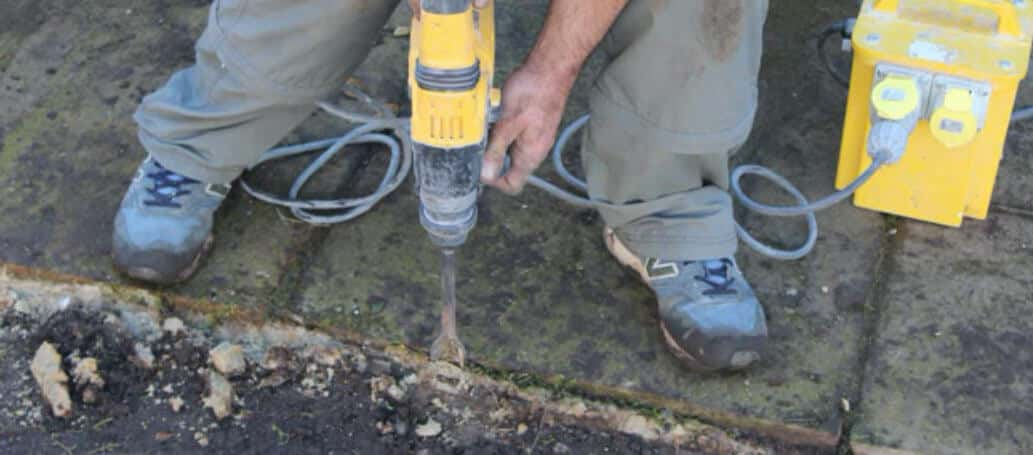
Now you’ve removed all the old turf, it’s time to think about installing the retaining edge. You can see below on this project we have installed an Oak railway sleeper edge to one side along the fence line. This creates a solid retaining wall that will ensure the stability of your artificial grass. The other edges had existing paving slabs that will work perfectly well. The paving edges were just tidied up by removing all the concrete to below the finished base level, normally 10-20mm below the paving level. This will allow enough depth to hold back the artificial grass and help create a nice neat edge. There are a few alternative ways to edge your lawn area, such as create a concrete haunch around the whole area, this allows you to glue the artificial grass directly to the concrete which gives a very stable and solid edge. For this demonstration we are going to use artificial grass pins to hold the edge of the grass down, which can make it simpler to lift the artificial grass, if over time you get some settlement and want to adjust the level.
Now you’ve got a good edge around the whole of your lawn area it’s time to create the base layer, a fine aggregate such as ‘fine type 1’ (3-6mm) is ideal for this application. You are looking for a minimum of 50mm depth of this aggregate to provide a good solid base, which will ensure the stability of your artificial lawn.
Next roll back the newly cut edges of the grass and roll out the LMP Super Tape joining tape with the green side down, this should run the whole length of the join and should be an even amount under each side.
Now cover the whole of the joint tape with Aqua Bond adhesive, its best to use a spreader for this so that you get an even coverage that is at a sufficient depth to cover the whole of the back of the latex backing, always use latex gloves when using this adhesive.
Then carefully and starting at one end, fold the two lengths of grass back over so they bond to the LMP Super tape. It’s a good idea to get some assistance at this point as it’s a tricky job that needs to be done carefully. Once this has been completed you will need to carefully firm the joint down, this can be done by walking over the glued area but be careful not to move the grass. The glue will take at least 2 hours to go off, but its good practice to leave it at least 24 hours before using your beautiful Authentic Lawn.
Once all the cuts and joins have been made and joints have dried, you can pin down your grass. This should be done at intervals of approximately 200mm around the edge of the lawn area. This will help stabilise your lawn and stop any edges lifting over time. There are a number of alternative edge methods such as nailing to timber battens sunk into the ground, or you can create a concrete edge and glue the grass to this.
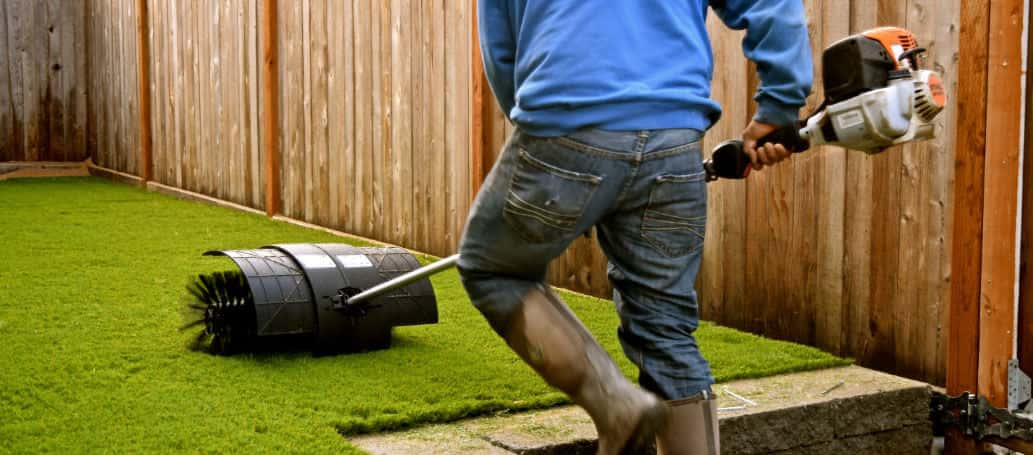
We would recommend a layer of Kiln dried sand is spread over any grass with a pile depth of 30mm or over, this will help to lift the pile and give the lawn additional weight to help with stability. Sand should be spread evenly over the whole of the lawn area at a rate of approximately 5kg per m2, then using a stiff brush, go over the whole area to lift the pile and hide the kiln dried sand. Continue brushing until no sand can be see and all the pile has been fully lifted.
IF YOU NEED ANY ADVICE PLEASE CONTACT A MEMBER OF STAFF AT YOUR LOCAL DEPOT, ON ONE OF THE NUMBERS BELOW, WHO WILL BE HAPPY TO ADVISE YOU ON ANY OF OUR PRODUCTS.
See our locations