Basket Preview
A Guide for Professionals
As landscape professionals, we've all seen the rise in popularity of Softwood sleepers used for retaining walls, raised beds and decorative purposes within the garden. Along with the rise in popularity we have seen a rise in unhappy customers, some with oak and softwood sleeper rotting out in a matter of a few years. In the vast majority of case this is because of incorrect installation or a lack of understanding what is possible to achieve in certain environments. Timber has been used for centuries within the house building industry, proving to be an incredible durable and versatile product, but in the vast majority of case the timber is always separation from the ground, this prevents the possibility of water transfer from the ground which in turn prevents any possibility of rot. These principles need to be transferred into the external environment as much as is practically possible.
In this short installation guide, we hope to offer some better guidance on how to install timber sleepers in the external environment, so as to not incur problems at a latter date.
A good understanding of what to look out for when purchasing sleepers will go a long way to getting the desired result at the end of the project and from many years to come. It's important to look out for a couple of things when purchasing softwood or oak sleepers.
Softwood sleepers must be pressure treated or tanalised (normally green coloured sleepers) to ensure that they have maximum protection from attack. Dipped (normally brown coloured) treated sleepers are not as good, as the preservative will not reach as far into the middle of the timber and doesn't offer such good protection.
With Oak sleeper you are looking for slow grown dense white oak timber that is much better suited to the UK climate. You also want sleepers that have been select with at least 2 good faces and minimal sap wood.
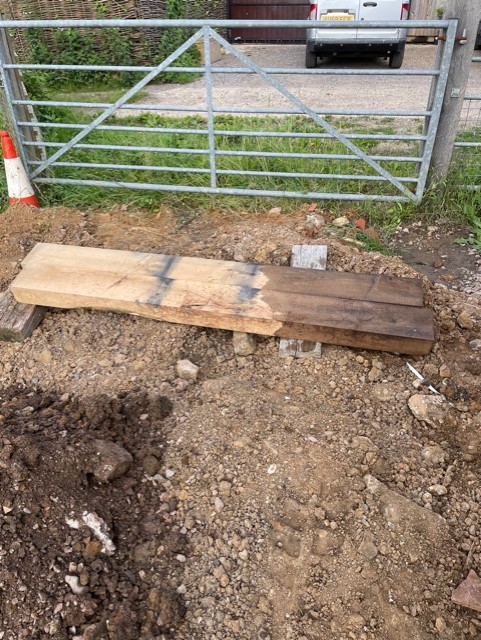
We would always recommend that any New Oak Sleeper that is going to come in contact with the ground or retained soil be treated with a suitable good quality wood preserver, prior to installation, this will provide additional protection to the timber itself. Please see example below showing oak sleepers treated before being used as gate posts.
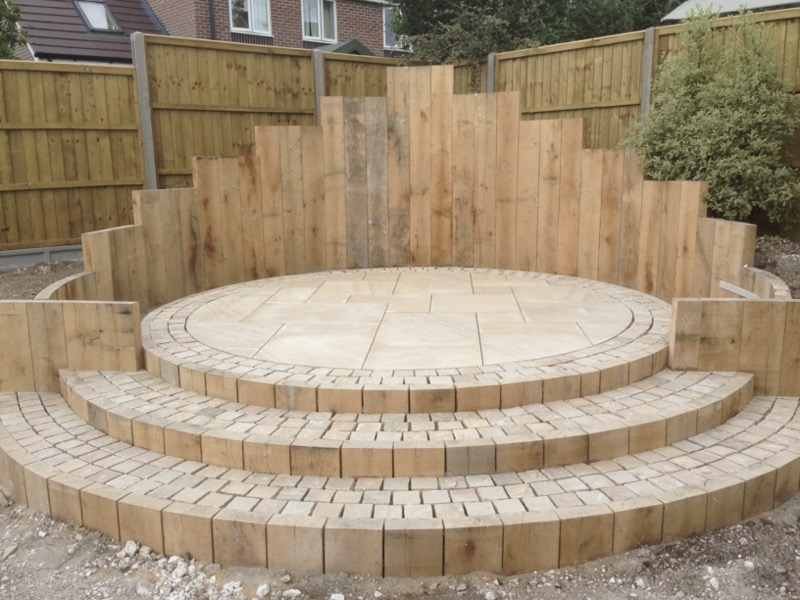
Vertically placed railway sleepers can offer a greater scope for design than traditional horizontal sleeper installation, in that you can vary the height of the wall in different places, and you can create a curved wall, rather than just straight lines. Each of these sleepers needs to be treated as if it's a fence post and concrete separately into a hole at least 1/3 of the total heigh of the sleeper being installed, i.e. 1500mm sleeper would need to be buried 500mm into the ground. When they are in place you can back fill with a concrete mix either dry or wet depending on your preference.
When the sleepers are fixed in place and the concrete set, you can use length of metal or timber to connect the backs of the sleepers together, this will help increase the overall strength and improve its retaining ability further.
When building a retaining wall or raised bed using sleepers stacked horizontally it is important to ensure that the sleepers are bedded on a sufficient strong foundation, preferably a concrete pad, this will provide sufficient support to the entire length of the wall.
Alway overlap the joints of the sleepers so they are staggered like a brick bond wall, with as even spacing as is possible. As you build the wall fasten each layer of sleepers to the layer below with Timberlok screws or something similar. In the case of oak sleepers you may need to pre-drill pilot holes first to ensure you fastenings do not break when under tension. When installing extremely long wall some additional vertical supports, normal more sleepers will need to be evenly spaced behind the wall and concrete into place to help improve the rigidity of the wall and to stop any possible future movement.
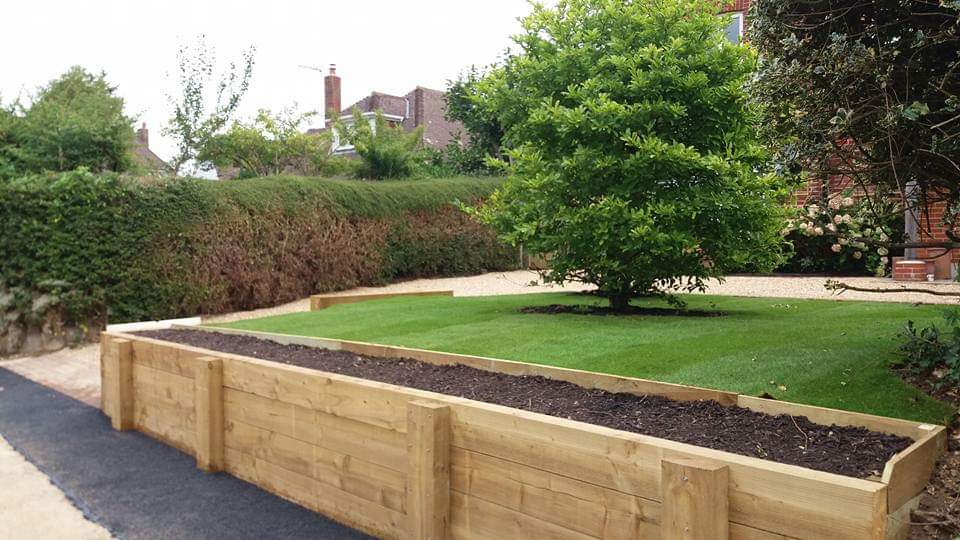
We do not recommend stacking sleepers on their narrowest edge for large retaining wall as they will not provide much in terms of strength but for small retaining walls, raised beds or decorative borders it will be sufficient but additional supports will need to be installed at regular intervals to stop future movement. Please see below retaining wall with exposed supports to maximise strength of the installation.
This is by far the most important part of any successful sleeper installation. If water is allowed to sit against timber it will start to rot after a matter of a few years, even with pressure treated softwood or oak sleeper that have been treated before installation. In extreme case not only will the wall start to decay but pressure known as hydrostatic pressure will build up behind the wall and lead to bulging and eventual collapse.
Correct drainage is one of the essential elements to focus on when building a sleeper retaining wall, ensure that there is a sufficient gap behind the wall to install all necessary drainage before you commence wall construction.
After laying the first course of sleepers, lay an agricultural drainage pipe on top of a geotextile membrane, this membrane needs to separate the clean aggregate from the surround soil. This will act as a filter to stop any soil or silt clogging up the drainage material and will greatly enhance the performance of your drainage.
This drainage pipe should be laid to 1 in 100 fall (10mm over a 1m length)
The drainage pipe should have an outlet at a low point at a maximum of every 20m and at both ends of the wall, this will stop the build up of any water behind the wall and great improve the longevity of the sleeper wall.
It is also important to have the correct drainage material. We recommend a 10-20mm clean, free drainage aggregate such as shingle or coarse crushed rock. It is imperative that the material is free from any soil, sand or other fines to ensure that water can flow freely through the drainage area and away from the back of the wall.
NATURAL STONE AND TIMBER LTD WILL NOT TAKE ANY RESPONSIBILITY FOR PROBLEMS CAUSED IF THE PRODUCT IS INSTALLED INCORRECTLY.
See our locations