Basket Preview
Installation Guide
Please see below some general guidance on installing the Porcelain Paving you have purchased from Natural Stone and Timber Ltd. This Guide is only to help give advice on how you should expect these materials to be installed and is in no way a definitive guide to laying Porcelain Paving
All the Porcelain Paving we supply is a premium products and should be installed by an experienced professional landscaping contractor or builder, who will be able to do justice to the quality product and also give you guidance on site conditions and provide a suitable installation method tailored to your specific requirements.
When your porcelain paving slabs have been delivered, check them all thoroughly for any breakages or chipping of the edges. Any damaged slabs should be put to one side as these can be used later for cuts and infills.
There will always be colour variations between batches, ensure you order enough to complete your project from one batch, never mix batches, allowing additional material for cuts and wastage. Always keep a record of the batch code of the porcelain you have collected or had delivered, just in case future stock is required. The batch code is printed on the side of packaging boxes covering the porcelain paving products.
The depth of the sub-base will vary depending on soil type and site conditions, but 100mm of consolidated MOT Type 1 crushed limestone or crushed concrete to the same specification can be used. This will provide sufficient strength for most paving jobs but clay soils and for driveway you will require additional depth up to 200mm. We would also recommend a geo-textile membrane (weed membrane) to be used under the sub-base especially in clay ground conditions, this prevents mixing between substrate and the sub-base.
Some landscape architects or very conscientious landscape contractors will specify a concrete foundation / base, that the paving will then be laid on. This is a successful method of construction for a sub-base but is better left to the professional contractor as mistakes are hard to correct. If this method is used it is possible to use a suitable exterior grade tile adhesive and important to use a less porous pointing product such as Instarmac Flow-Point or an external grade grout. Always prime the surface of concrete with two coats of a cement based primer such as Instarmac Pro-prime, before commencing installation.
If your site has clay soils or is naturally damp for prolonged period, it might be advisable to install additional land drainage underneath the whole paved area, this will stop moisture sitting underneath your paving slabs which can cause problems during winter months due to freeze / thaw cycles.
An important consideration when excavating for your sub-base is the finished level of the paving. It must be 150mm below the damp proof course or two bricks down.
In most cases your patio should gently run away from the house or any building except where drainage is to be provided. A slope of between 1:80 to 1:100 will be sufficient but depending on the lye of the surrounding land the fall could change. The sub-base should slope at the same rate as the finished level of the patio.
String lines will need to be used to set the finished height of your paving and to determine the falls necessary for the correct drainage of your patio.
For more information follow the below link has some great advice.
https://www.youtube.com/watch?v=eQBNSIOLhiI
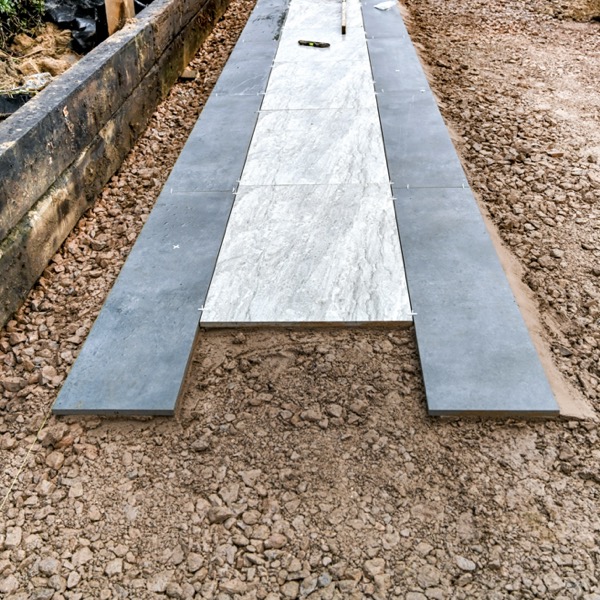
It is always good practice to layout your proposed patio by placing the porcelain paving slabs across the entire area of the proposed patio. This will help highlight any potential issues with regard to cuts and joint spacing and will also help to confirm you have enough paving to complete the project from what has been delivered, without having to order again later, which can be problematic.
When installing low porosity stones, such as granite, certain limestones, and all Porcelain Paving materials, you must use a primer that is specifically formulated for these materials.
We would recommend using a product called Instarmac Pro-Prime (link below) which is a cement-based primer which adds adhesion between your bedding material and the paving slab. If you fail to undertake this process it will, in many cases, result in failure of the porcelain paving slabs adhering to the bedding material and eventual movement of the paving. The slurry prime is always applied to the underside of the Porcelain paving slabs, being careful to clean off any material that is spilt on the surface of the slabs immediately. The fully primed slabs need to be placed directly onto the bedding material wet on wet.
Pro-prime is available from all Natural Stone and Timber branches.
https://www.instarmac.co.uk/ultrascape-products/pro-prime-slurry-primer
Always bed porcelain paving slabs on a solid mortar bed made with a maximum of 4 parts sharp sand / grit to 1 part cement. But you should always try to match the strength of the bed to the density of the slabs you are installing.
If using a permeable jointing compound such as Easyjoint, a 6 parts sharp sand to 1 part cement bedding mix is recommended to allow for additional drainage.
The use of a plasticiser can help get a more workable consistency to the mix.
Never lay paving on dots and dabs of mortar also known as the five-spot method. This will leave voids under the paying which are prone to movement through freezing and thawing and allows the possibility of discolouration of the slabs and in some cases the slabs can become loose and eventually crack.
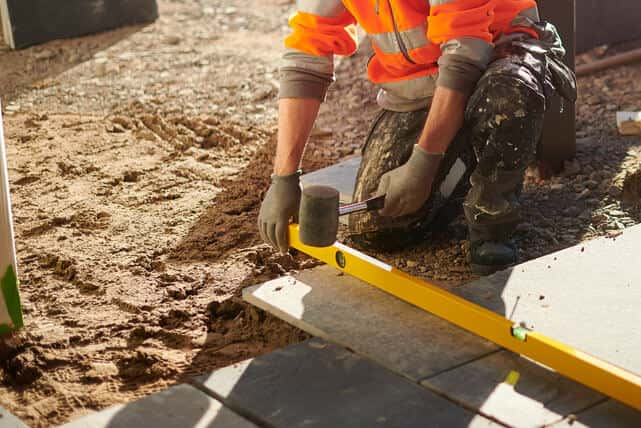
Once you have a well-mixed creamy mortar you are ready to start laying. Spread the mortar mix out evenly onto the desired location allowing additional mixed above the finished level to be the slabs into. Then you can tamp down the ‘wet primed’ porcelain paving onto the mortar bed using the rubber mallet. Adjustment will be necessary to ensure that the paving is set in at the desired height and is fully supported with a full bed of mortar. Use a large straight edge with a spirit level repeatedly to check that each paving slabs is set at the desired level and falls that you have set out with your string lines.
When laying porcelain slabs you should work as cleanly as possible, cleaning away any cement or mortar marks immediately, as they can be extremely hard to remove when they have dried.
If you are laying more than one full pack of paving, ensure that you select the porcelain slabs from all the different packs at the same time, to eliminate colour banding and to obtain the best colour blend.
We would recommend a joint spacing of between 3 and 10mm for all porcelain paving slabs, it is not advisable to butt joint porcelain paving and can cause problems with installation due to tolerances in the size of the porcelain slabs themselves which can be as much as +/- 2mm.
On most installations a 5mm spacer would be used to help maintain even joint spacing between all porcelain slabs.
On any joint below 5mm and external grout should be used, but please consult with your contractor before purchasing to insure you are buying the correct product for your paving.
If you are cutting using a grinder, you must ensure that the slabs you are cutting is fully supports and firmly bedded before you undertake any cuts as any movement will result in breakages or excess chipping. You can use a good wooden pallet with either a rubber mat or piece of carpet to add this support.
We recommend using an external grade grout such as Azpects easy grout, this product is only suitable for porcelain products and should be used in accordance with the manufacturer's guidance.
Always follow the manufacturers' guidance on mixing and application of their specific grouting products to achieve the correct consistency and quality needed for a successful installation. Ensure that particular care is taken to clean and wipe away all grout until the surface is completely clean and the sponge you are using runs clean. Finally going over with a clean dry cloth to ensure the surface is completely clean.
No residue should ever be left to set on the surface of the porcelain, but if you find some very slight hazing left after insufficient cleaning. This can normally be removed with a full cleaning of the area using a product such as: Universeal Grout Haze Remover.
Porcelain paving can also be sealed to improve its stain resistance properties but is not as crucial as sealing natural stone paving products. We would recommend using Patio Porcelain floor tile sealer from Universeal, but this is best used by a professional contractor as mistakes with this sealer are extremely hard to rectify.
Please ensure that the area to be sealed is completely clean, dry, free from debris and surface staining and that you have at least 24 hours of dry weather ahead.
Application guidance is available on the bottles must always be always followed to ensure success application. From more information on these products please use the link below. If you are installing very light coloured natural stone products it is particularly important to use land-based aggregates which have a lower salt content and white cement or alternative use white tile adhesive, but this would require a solid concrete based to be installed first. This will help prevent discolouration of the stone.
For further information please follow the link below for a good instructional video on laying porcelain paving:
https://www.youtube.com/watch?v=BGA1A5JW3hE
IF YOU NEED ANY ADVICE PLEASE CONTACT A MEMBER OF STAFF AT YOUR LOCAL DEPOT, ON ONE OF THE NUMBERS BELOW, WHO WILL BE HAPPY TO ADVISE YOU ON ANY OF OUR PRODUCTS.
See our locations